EZ Make & Take ~ Articles

EZ Make & Take - Decoupage

Image
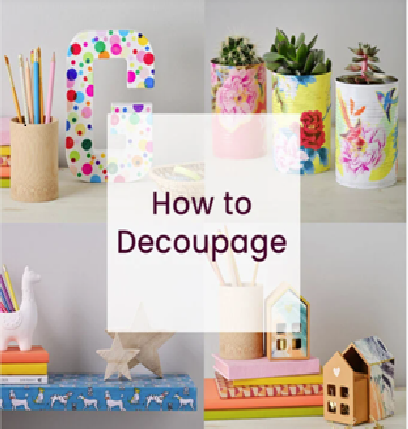
Decoupage

Decoupage is a fun craft for any age and any ability!  There are so many ways to create unique designs with this popular craft technique.

The Basics of Decoupage

Pick a surface, prepare it, and then decorate with paint or other effects (you can also leave it bare if you like that look). 

Bring one of the following objects for you surface: 

  • Wood (box)
  • Tin (can)
  • Glass (bottle – remove all labels) 
  • Ceramic object
  • Metal object
  • Fabric (including clothing and shoes)
  • Terra Cotta (pot)

Once you decide on a surface, pick the things you want to adhere to the surface. Here are the most common ideas:

  • Scrapbook paper
  • Wrapping paper
  • Tissue Paper
  • Napkins
  • Stickers
  • Fabric

You may use also use pictures from the internet (resize for you project) or upcycle other accessories.

We will provide the following, but you may also bring your own:

  • Mod Podge
  • Sponge brushes
  • Small paint brushes
  • Decorative Napkins
  • Scissors

STEPS:

  • Prepare the surface – sand or clean the item you’re going to decoupage
  • Prepare the items to be decoupaged – cut your fabric, paper, etc.
  • Cut the items to fit the surface
  • Decoupage the elements with mod podge
  • Smooth everything down
  • Add a protective coat to the project

Step 1: Optional - Paint your base; you may need to do two coats and let it dry.

Step 2: Select the things you want to add to your project and lay them out on your surface to get an idea of how they may look.  Move them around until you are satisfied.  It is easier to move things before you paste them down.  Snap a photo so you will have a guide to your layout.

Step 3: Spread mod podge on the back of the articles and stick them to your object.  It is also fun to just freeform your design and scatter your art.

Step 4: Apply a thin layer of mod podge over the entire surface.  LET DRY. Repeat until the top layer appears flat or until you are satisfied.

Step 5: Optional – when completely dry (wait 24 hours) apply a layer of varnish with a brush on top of everything to finish.  You may also just use a spray 

SAMPLES IN GALLERY

EZ Make & Take - Wire Spider Ornament

How (and Why) to Make a Christmas Spider

Image
Wire Spider Ornament

by Leslie, Exclusively for Fire Mountain Gems and Beads®


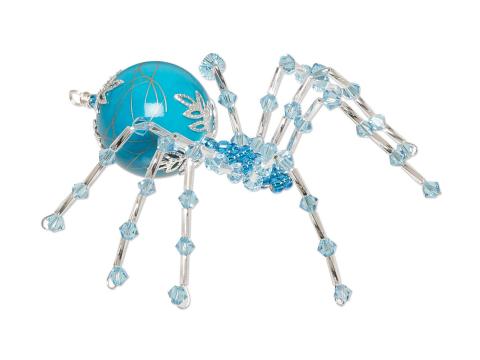
Ready to make a Christmas spider ornament? Yes, Christmas spider! Spiders aren't just for Halloween. The legend of the Christmas spider is an ancient story about the origin of tinsel for Christmas trees. Learn all about the history of Christmas spiders placed in Christmas trees and then make your own beaded spider with full FREE instructions.

Image removed.

Legend of the Christmas Spider


Christmas spiders may not be as iconic as Rudolph and Frosty to western audiences but placing eight-legged ornaments in a Christmas tree is a well-known European tradition. According to the folktale, a mother was busy cleaning her home for Christmas. As she swept and cleaned, spiders fled to the attic to be out of the way. On Christmas Eve night, the spiders came out for a peek and exclaimed, "What a beautiful tree!"

In the spiders' excitement, they scurried along the branches, adding their grey webs to the decorations. When Santa arrived with gifts for the children and saw how happy the spiders were, he was filled with joy. He knew though, the mother would be sad to see her tree shrouded in dull webbing, so he turned the strands to silver, making the tree even more radiant than before.

There are variants of this story, including that the Christ child changed the webbing to tinsel because spiders were God's creatures and loved, too. He did not want the mother to be dismayed by the spiders' enthusiasm. Another take on the story suggests a widowed mother and her children were too poor to decorate their Christmas tree. On Christmas Eve, the spiders spun their webs along the branches. When the family awoke on Christmas and saw the sunlight on the webbing, turning it silver and gold, the family was jubilant at the beautiful sight.

No matter the version told, the result was the placing of tinsel and a spider ornament amongst the branches of Christmas trees.

Image removed.

Spider Symbolism


Still not sold on spiders? While spiders may give some people the creeps, these arachnids have been considered lucky or good omens by dozens of cultures throughout history--and these are only a handful of examples. In ancient China, seeing a spider drop from its web was a sign you would be blessed with good luck. In ancient Rome, spiders were believed to be symbols of prosperity. Many Native Americans respected spiders and believed dreamcatchers came from a benevolent Grandmother Spider. In West African folklore, Anansi was a spider god who was associated with storytelling and wisdom. According to ancient Indian writings, a large female spider wove the universe we inhabit. This spider sits at the center of the web, directing things with her strands. Spiders are mentioned in the Bible as humble creatures, yet they inhabit kings' palaces.


Christmas Spider Components


Now that you know the history of tinsel and the Christmas spider, it's time to actually make a beaded spider. Christmas spiders can be as small or as large as you want. Here are a few suggestions for various parts of the spider based off examples we've seen:

Image removed.

Head:

Body:

Legs:

Additional Embellishments:

Make a Christmas Spider


Image removed.

STEP 1

Cut four 7-inch lengths of 24-gauge wire and one 6-inch length of 20-gauge wire.

STEP 2

At the end of the 6-inch length of wire, create a spiral that is approximately the size of the end of an acrylic nugget.

Note: View ''Forming a Wire Spiral'' illustrated instructions for additional details.

STEP 3

Gather the 7-inch lengths of wire together. Using all the lengths at once, curve the wire in the center around the jaw of round-nose pliers.

Continue to bend the wire ends in opposite directions to create a loop. Holding the loop tightly with the pliers, twist the two groups of wire ends to secure the loop.

STEP 4

String an acrylic nugget, the wire loop created in Step 3 and a 12mm acrylic round onto the straight end of the 6-inch length of wire. Create a wrapped loop on the 6-inch length of wire, tight against the round bead.

STEP 5

Onto a leg string six sets of one bugle bead and one seed bead, then create a simple loop. Repeat to bead the remaining legs.

Image removed.

Design with ...

Additional Resources ...
 

Yarn Birds

Image
Yarn Bird

https://www.instructables.com/DIY-Cute-Yarn-Bird/

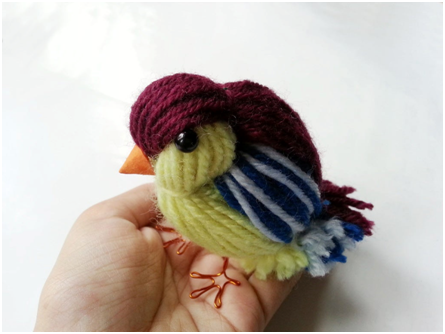
DIY Cute Yarn Bird

Step 1: Materials Needed

To make this bird you will need:
1.    Yarn - 3-4 different colors
2.    Scissor
3.    Cardstock paper or Cardboard
4.    Ruler
5.    Craft glue
6.    Craft wire
7.    Craft pliers
8.    Beads - 2 black medium size
9.    Needle and black thread

Step 2: Preparing the Yarns
       
Cut 3 pieces of cardstock paper or cardboard. 
The width of the cardstock papers should be around 4-5 cm. (1 ½ inches)
Two cardstock papers should be 9 cm (3 ½ inches) and the other one 12 cm (4 ¾ inches). 
The measurement will vary depending on the size of the bird.
Take different colored yarn and wrap them around the cardstock papers lengthwise. Keep wrapping them until they are thick enough (1cm thick in each side).
Hold the yarns on the cardstock firmly and cut any one side. You will get a group of yarn strands.
Tips:
•    For large cardstock paper or cardboard use dark colored yarn, this will be the upper part of the bird,
•    For one of the cardstock paper or cardboard use light colored yarn, this will be the lower part of the bird,
•    For the other cardstock paper or cardboard mix 2 colors together to create the wings with these yarns.

Step 3: Joining the Upper and Lower Part
      
Take the 12 cm long yarn group (dark colored) and place it on a flat surface horizontally. Take the light colored group of yarns and place it on the longer group of yarns vertically, right in the middle, creating a cross.
Fold the dark colored yarns into half, wrapping the light colored yarn group.
Take a small piece of dark colored yarn and tie it around the half folded yarn group tightly.
Now fold the light colored yarn group into half, take a small piece of light colored yarn and tie it around the half folded yarn group tightly.
Make sure that the edges of both half folded yarn groups are leveled.

Step 4: Joining the Wings
 
Take the mixed yarn group and place it below the tied yarns from the previous step. The dark colored yarn groups knot should be facing up.
Take a small piece of paper (half of A4 sized paper). Crumple the piece of paper and squeeze it to make it small. The size of the bird’s body depends on the crumpled paper size.
Place the crumpled paper in between the 3 group of yarns as shown in the 2nd picture of this step.
Hold the open ends of the yarn groups together tightly. Take small piece of any colored strand and tightly tie it around that end to join all the yarn groups together.
Trim the end of the yarn groups to level them.
  
Step 5: Attaching Other Features
 
Make a small cone from orange colored cardstock paper for the beak.
Use craft wire to make the legs.
Simple attach 2 black beads on both sides of the birds head using needle and matching thread.
Attach the legs by bending the open ends of the legs and inserting it through the yarns of the lower part.
Glue the beak to complete the bird. 
Use different colored yarns to make different patterned birds.      
 

Sock Pumpkin DIY  

SUPPLIES:

Please bring, if you have:
•    Sock(s) – bring more than one and make some more 
•    Small stick – I’ll have a few

We have the following supplies, but of course you may bring your own:
•    Scissors 
•    Fiber fill or other type of stuffing material
•    Needle and thread, embroidery floss, or yarn
•    Felt scraps
•    Hot glue gun - we have plenty
•    Ribbon, twine, (we have plenty) and any other embellishments you want to add

INSTRUCTIONS
•    Cut your sock. Either cut just below the heel and use the bottom section (the toe) or cut above the heel. For some the pattern may be around the ankle section.
  
•    If you use the upper section of the sock, you will need to close one end of the sock.
•    Turn the sock inside out.
•    Weave your needle and thread in and out along one edge then pull the thread to gather the end.
•    Sew the end together until it is secure.
•    Turn your sock right side out.
 
•    Put a small amount of rice or dried beans in the bottom to give it some stability.
•    Fill the rest with stuffing to your liking.
 
•    Weave your needle and thread all the way around the top opening just above the stuffing, then pull the thread to gather and close the top.
•    Sew back and forth the secure the top closed.
•    Cut off the excess fabric above the stitching.
 
•    Insert your needle and thread into the center of the bottom and push it up through the center top.
•    Loop the thread around and insert it back up through the bottom and pull it tightly to create a ridge.
 
•    Continue wrapping the thread around in even increments to create the rest of the ridges.
 
•    Once you are done with the ridges, knot and tie off the thread
 
TIME TO MAKE IT FANCY
•    Cut out leaves from your felt, then hot glue them to the top of your pumpkin.
•    Hot glue the stem to the center.
•    Grab any other embellishments you want to add, and your hot glue gun, and get crafty.
•    Floral/twine may be wrapped around a pen to make it spiral, add bows, etc. and glue those around the stem.

 
 INSTRUCTIONS WITH PHOTOS WILL BE AVAILABLE AT OUR WORKSHOP